

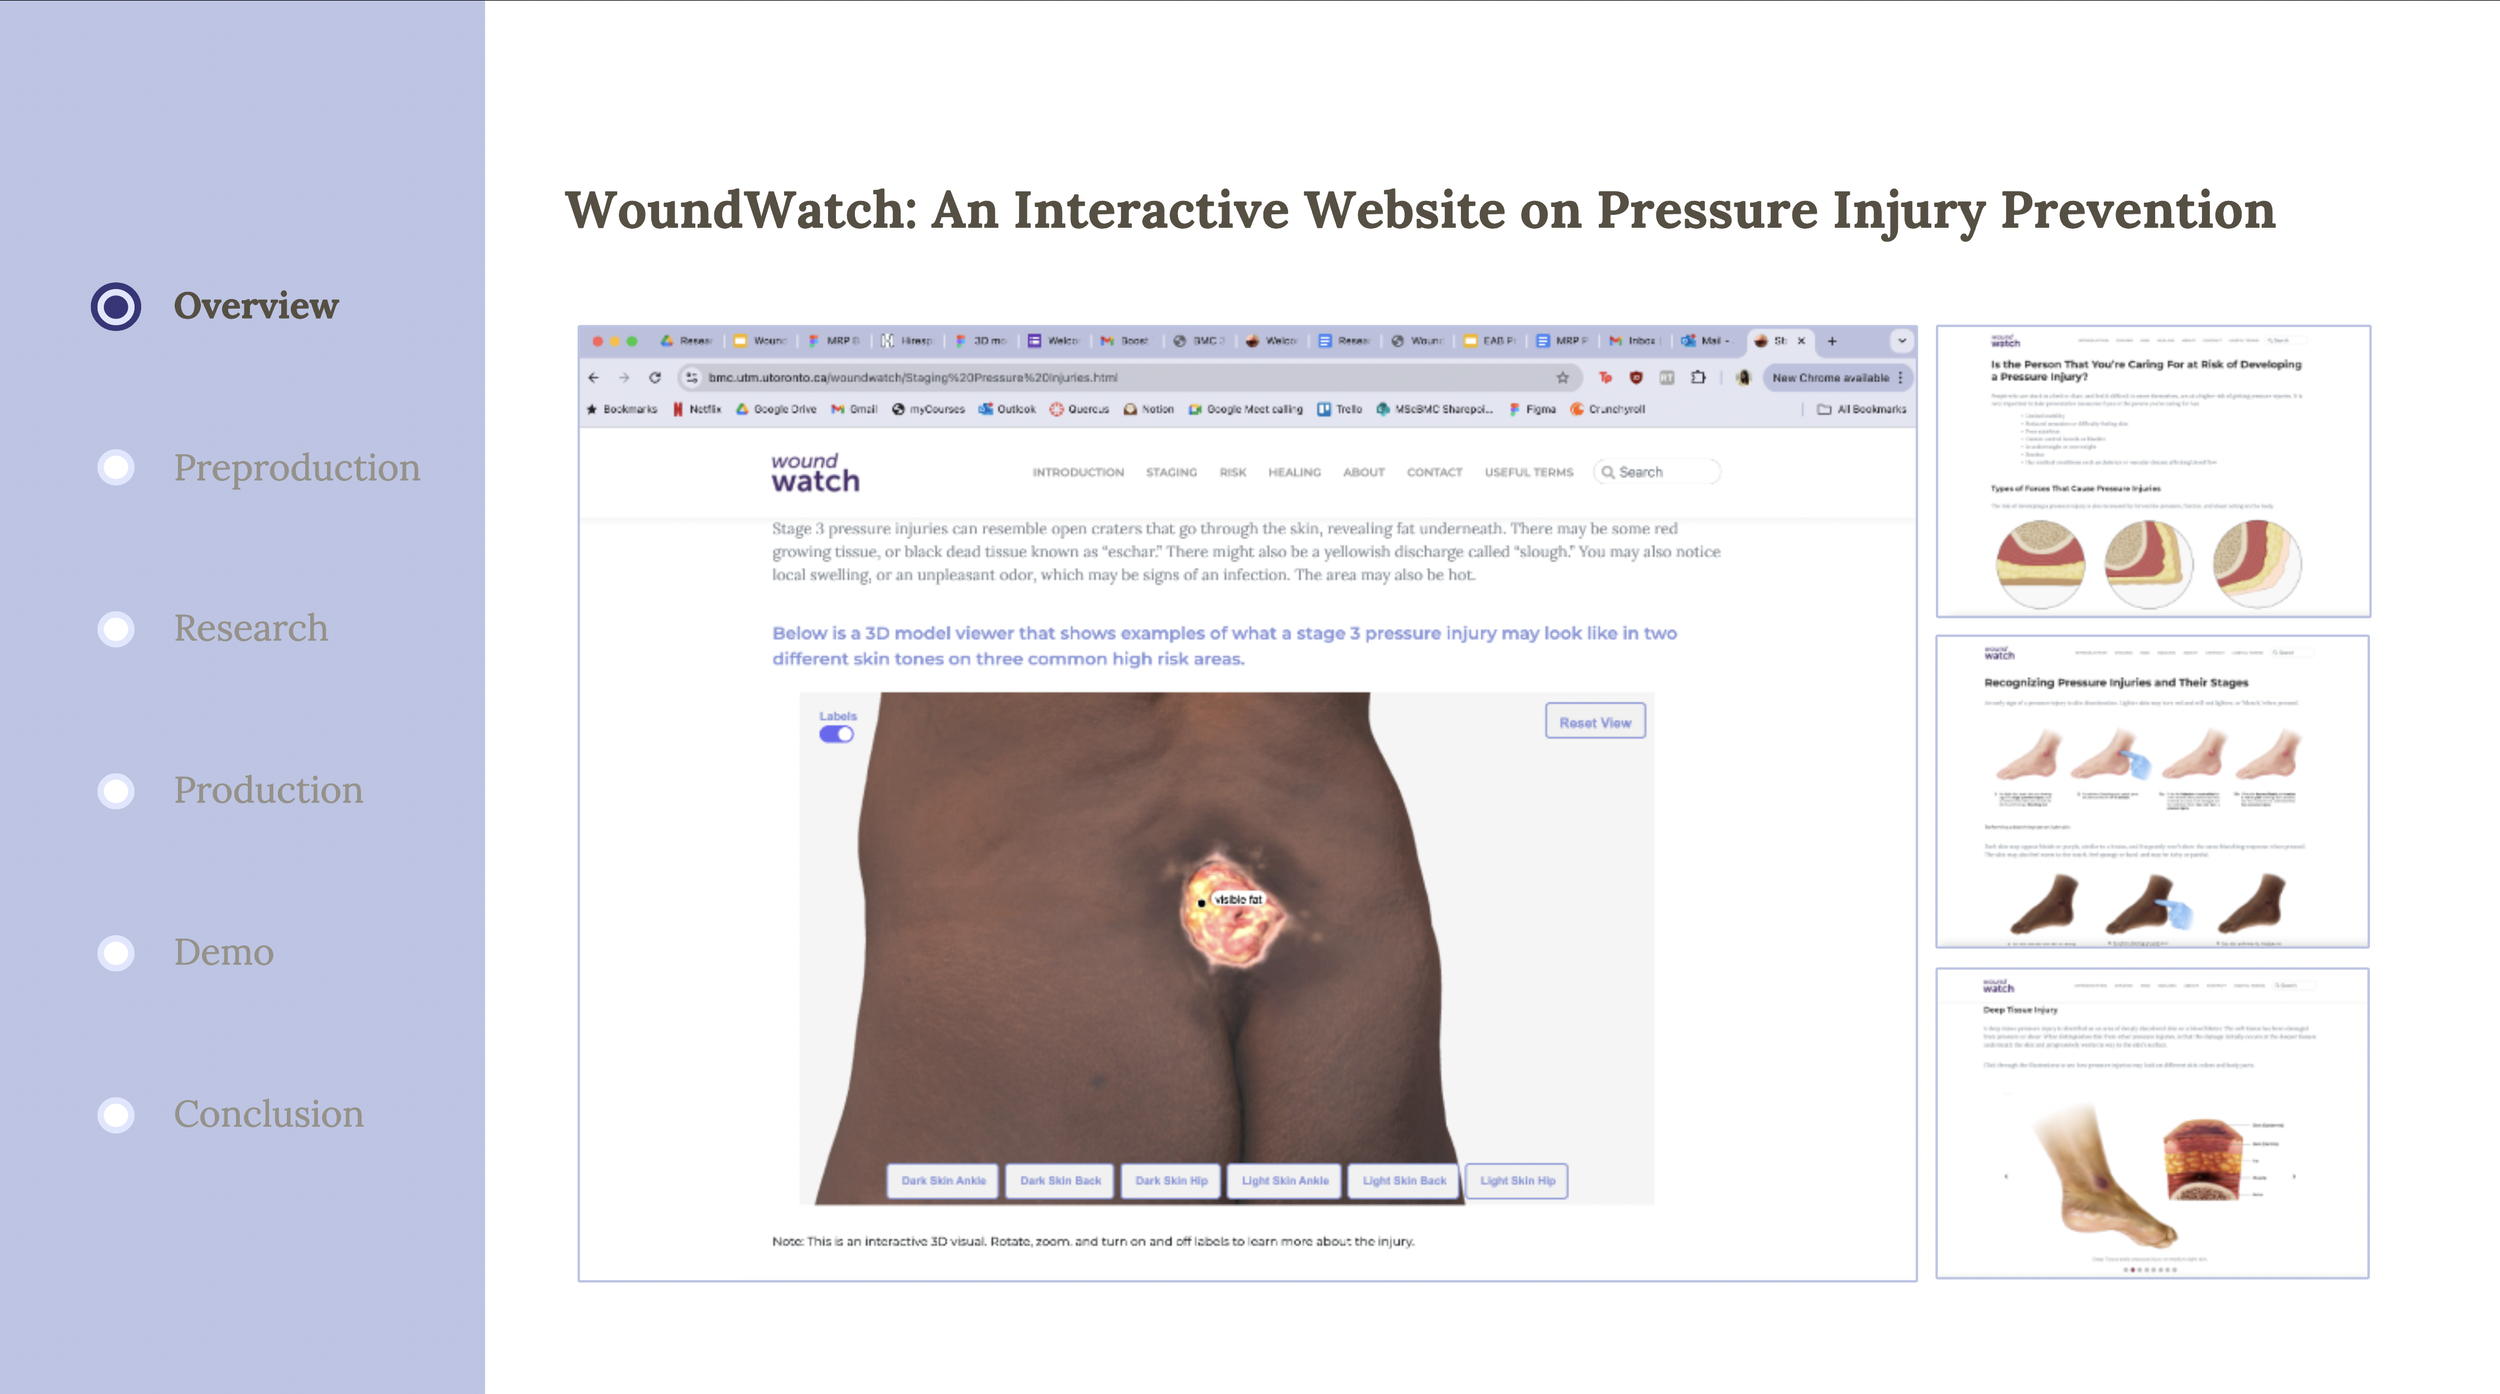
WoundWatch
An Interactive Website on Pressure Injury Prevention for Unpaid Caregivers and Care Recipients
Master’s Research Project:
WoundWatch
Pressure injuries are tissue wounds caused by prolonged pressure and shear forces. These injuries result in significant pain and distress for patients and their caregivers. WoundWatch is an online resource that covers skin health related to pressure injuries for informal and unpaid caregivers.
This Master’s Research Project is designed to be a preventative skin-health resource for pressure injuries that addresses the following:
What pressure injuries are
Who may be at risk
High risk areas
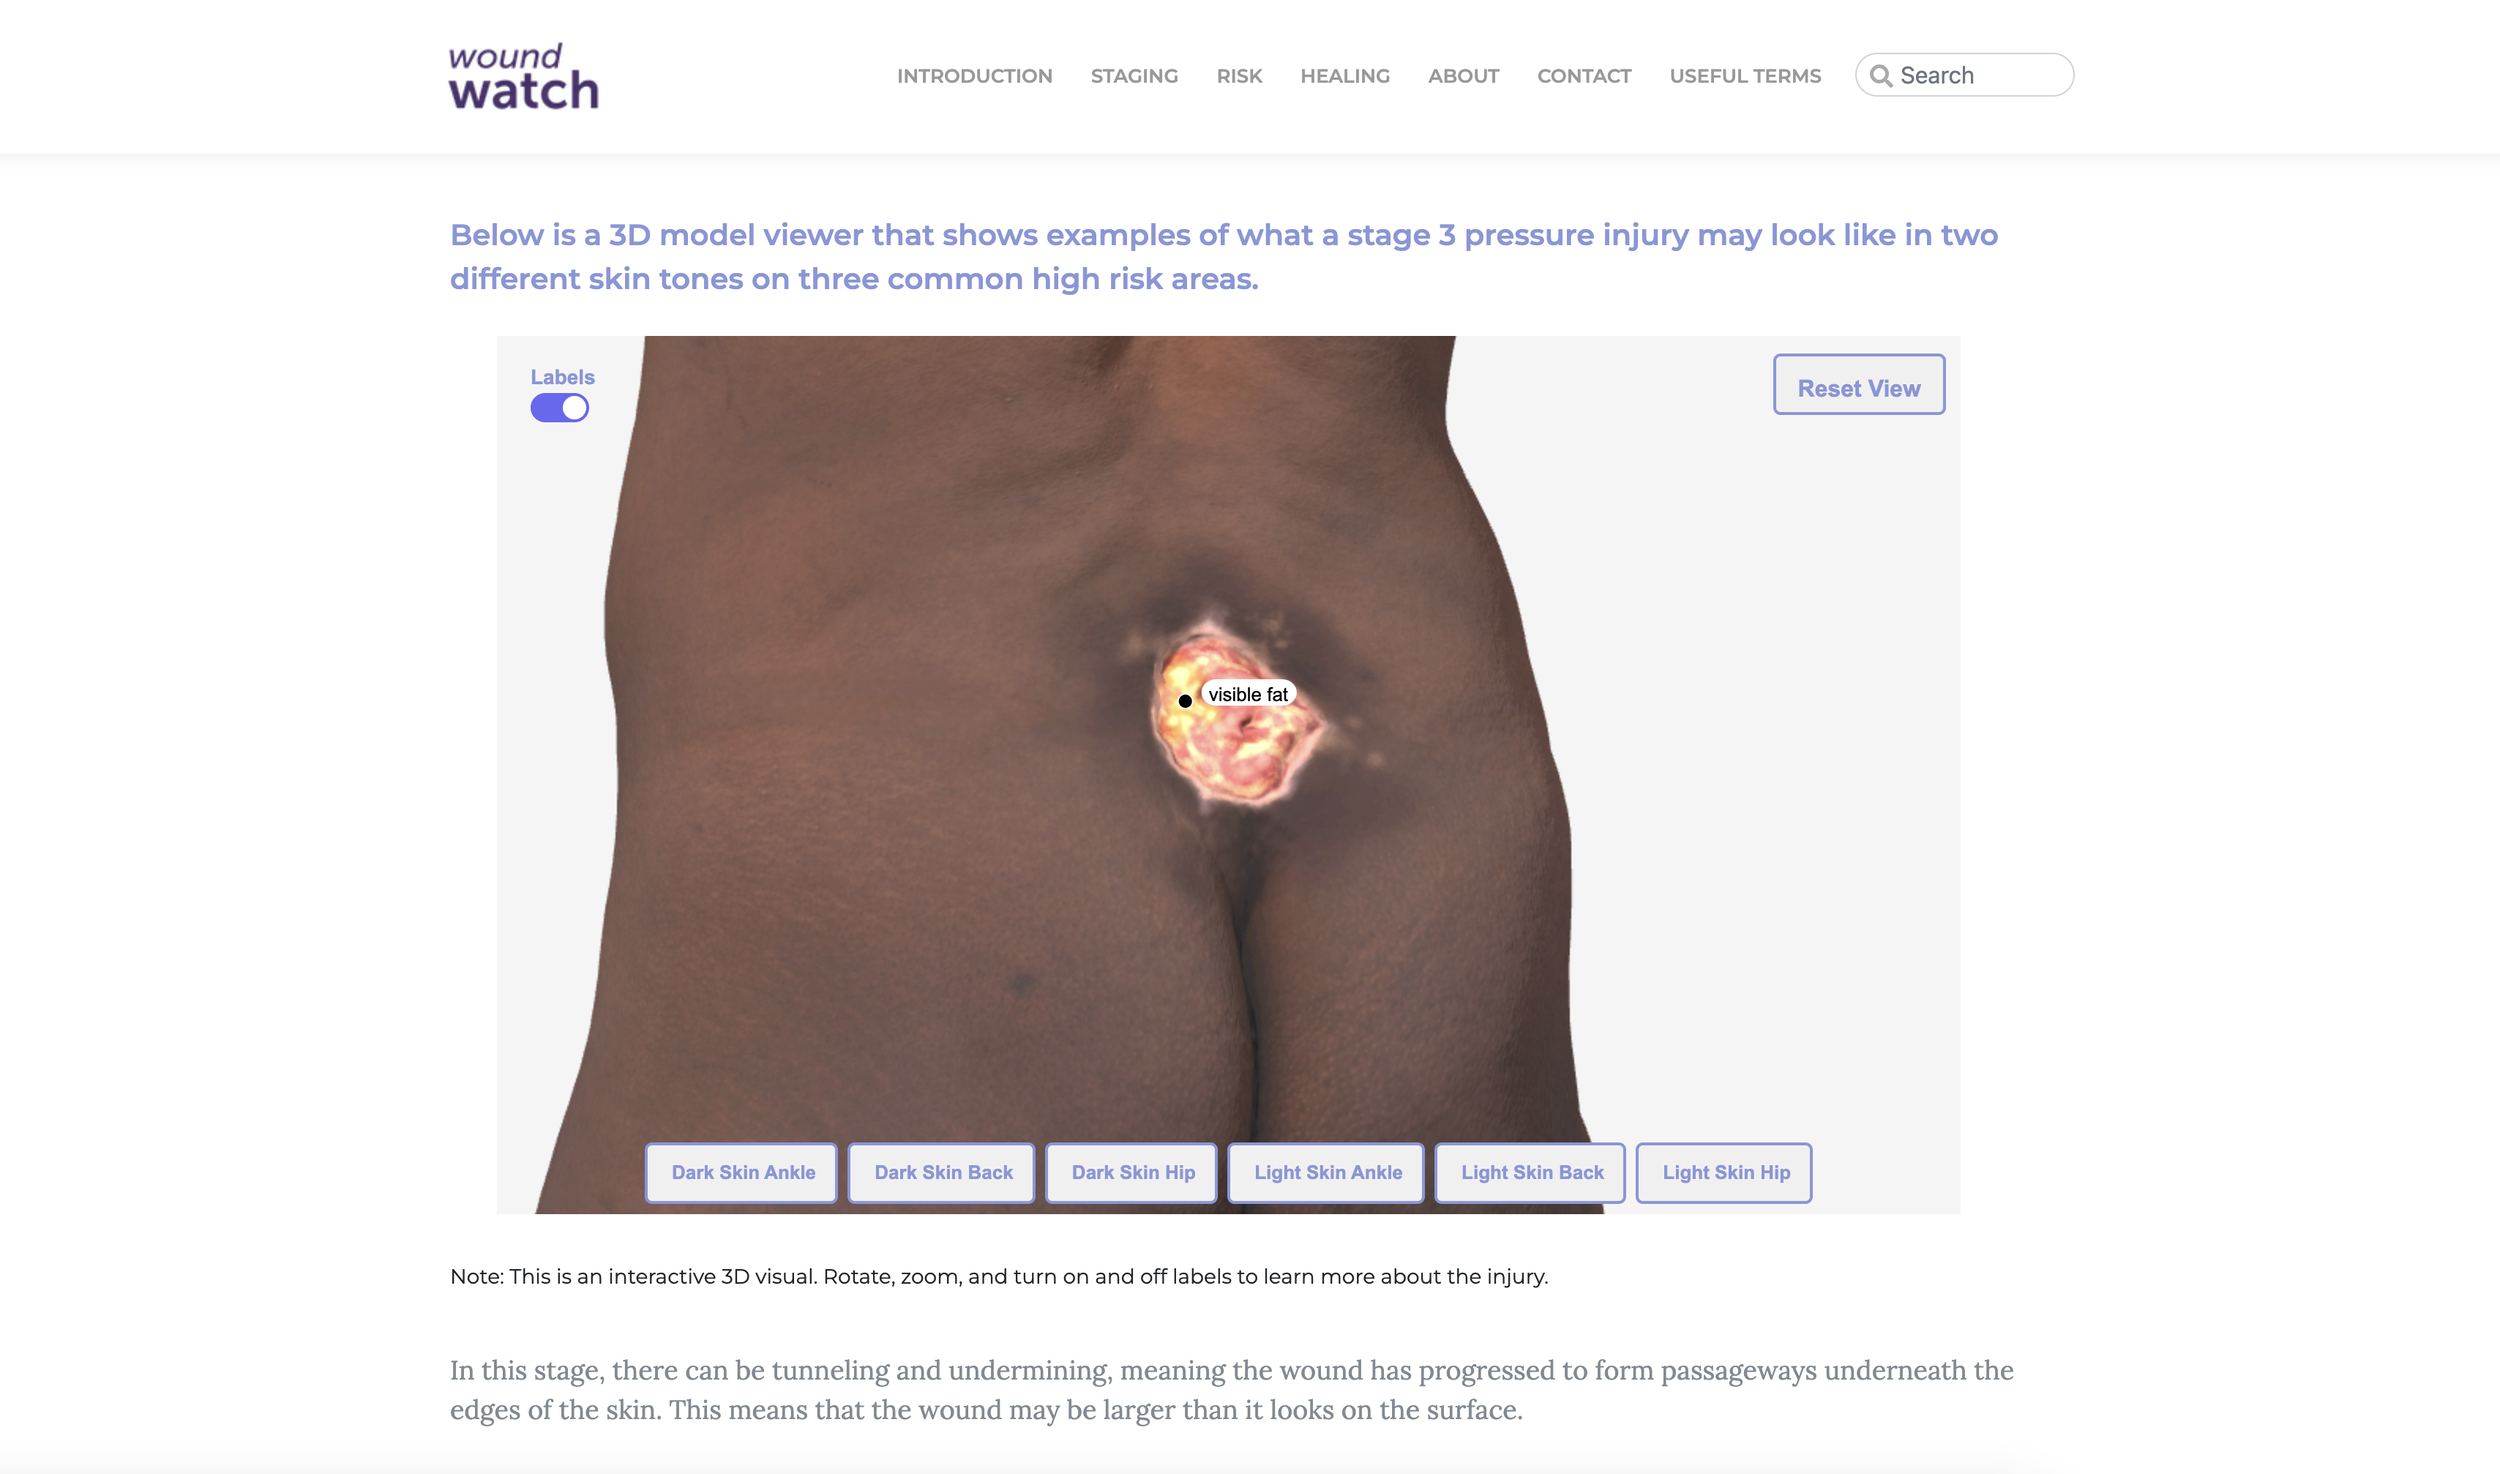
Recognition of pressure injuries and their stages on various skin tones
How to identify a healing pressure injury
Complications associated with pressure injuries
Role: Researcher, Content Writer, Designer, Illustrator, Modeler, Developer.
Clients: Michael Corrin (MScBMC at The University of Toronto, Faculty Advisor), Sharon Gabison (BScPT at The University of Toronto, Content Advisor).
Project Deliverable: Interactive Website.
Tools: Zbrush, Cinema4D, Adobe Illustrator, Adobe Photoshop, Procreate, HTML, CSS, Javascript.
Audience: Unpaid Caregivers and Care Recipients.
Link to final website: WoundWatch


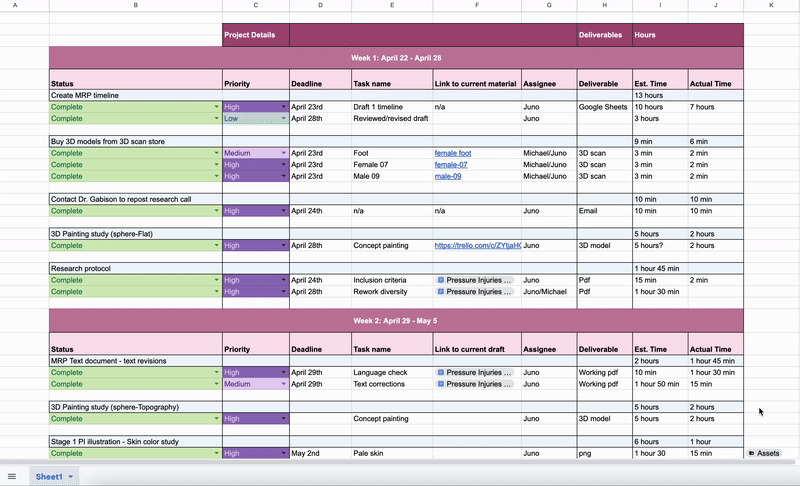
Project Management & Inventory
To stay on track and keep accountable, I created a project inventory that I shared with my faculty supervisor and content advisor. Each committee member was able to refer back to the document to see the project’s current state and progress, member responsibilities, deadlines, and links to current material.
3D Model Viewer Wireframes


Initial Style Guide and UX/UI Toolkit
During the wireframe design iterations, a comprehensive style guide was created to ensure consistency and coherence across the design elements. The style guide included guidelines for typography, color schemes, icons, and interactions.
This guide was developed to maintain a unified design throughout the project and was updated based on iterative feedback.

Assessing the Value of Interactive Models
Determine whether users saw value in 3D interactive site-specific injury models when compared to traditional 2D static images.
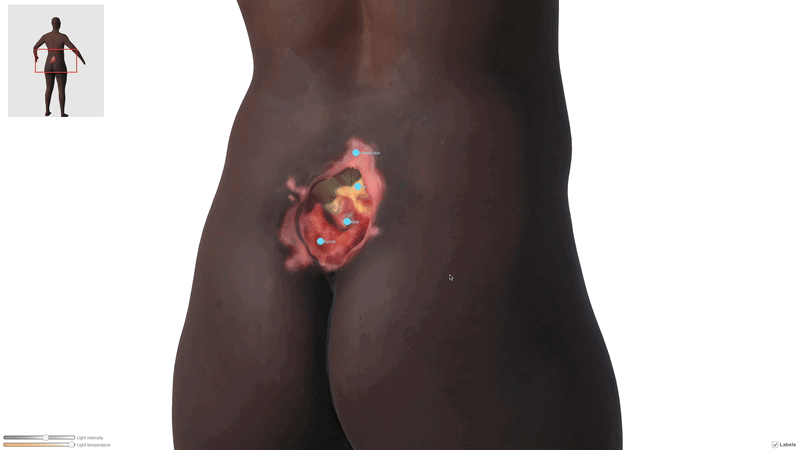
User Manipulable vs 2D static
Ascertain if the ability to observe a pressure injury from various orientations aids in recognizing injury features on dark skin.
Various Orientations

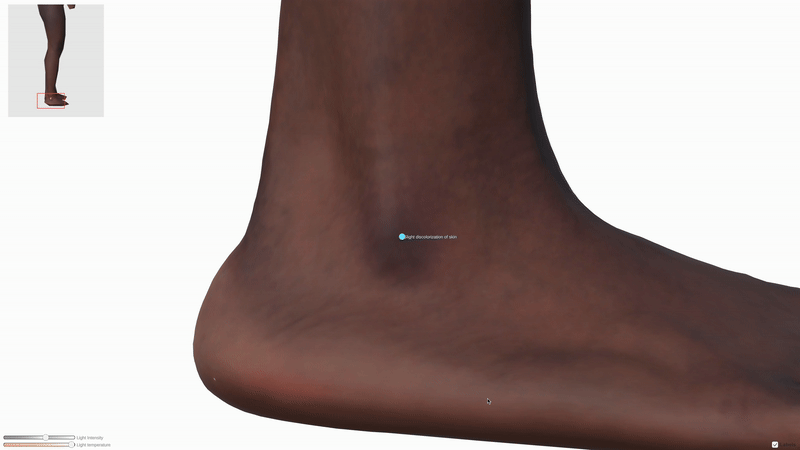
Establish whether the use of dynamic and user manipulable lighting enhances recognition of pressure injuries on dark skin.
Dynamic Lighting
2D Staging Illustration Production Process


For the 2D staging assets that I created for this project, I implemented a workflow that expedited the production of numerous variations of contextualized staging illustrations. I began by creating neutral underpaintings for a foot and a backside.
Foot and backside underpaintings.

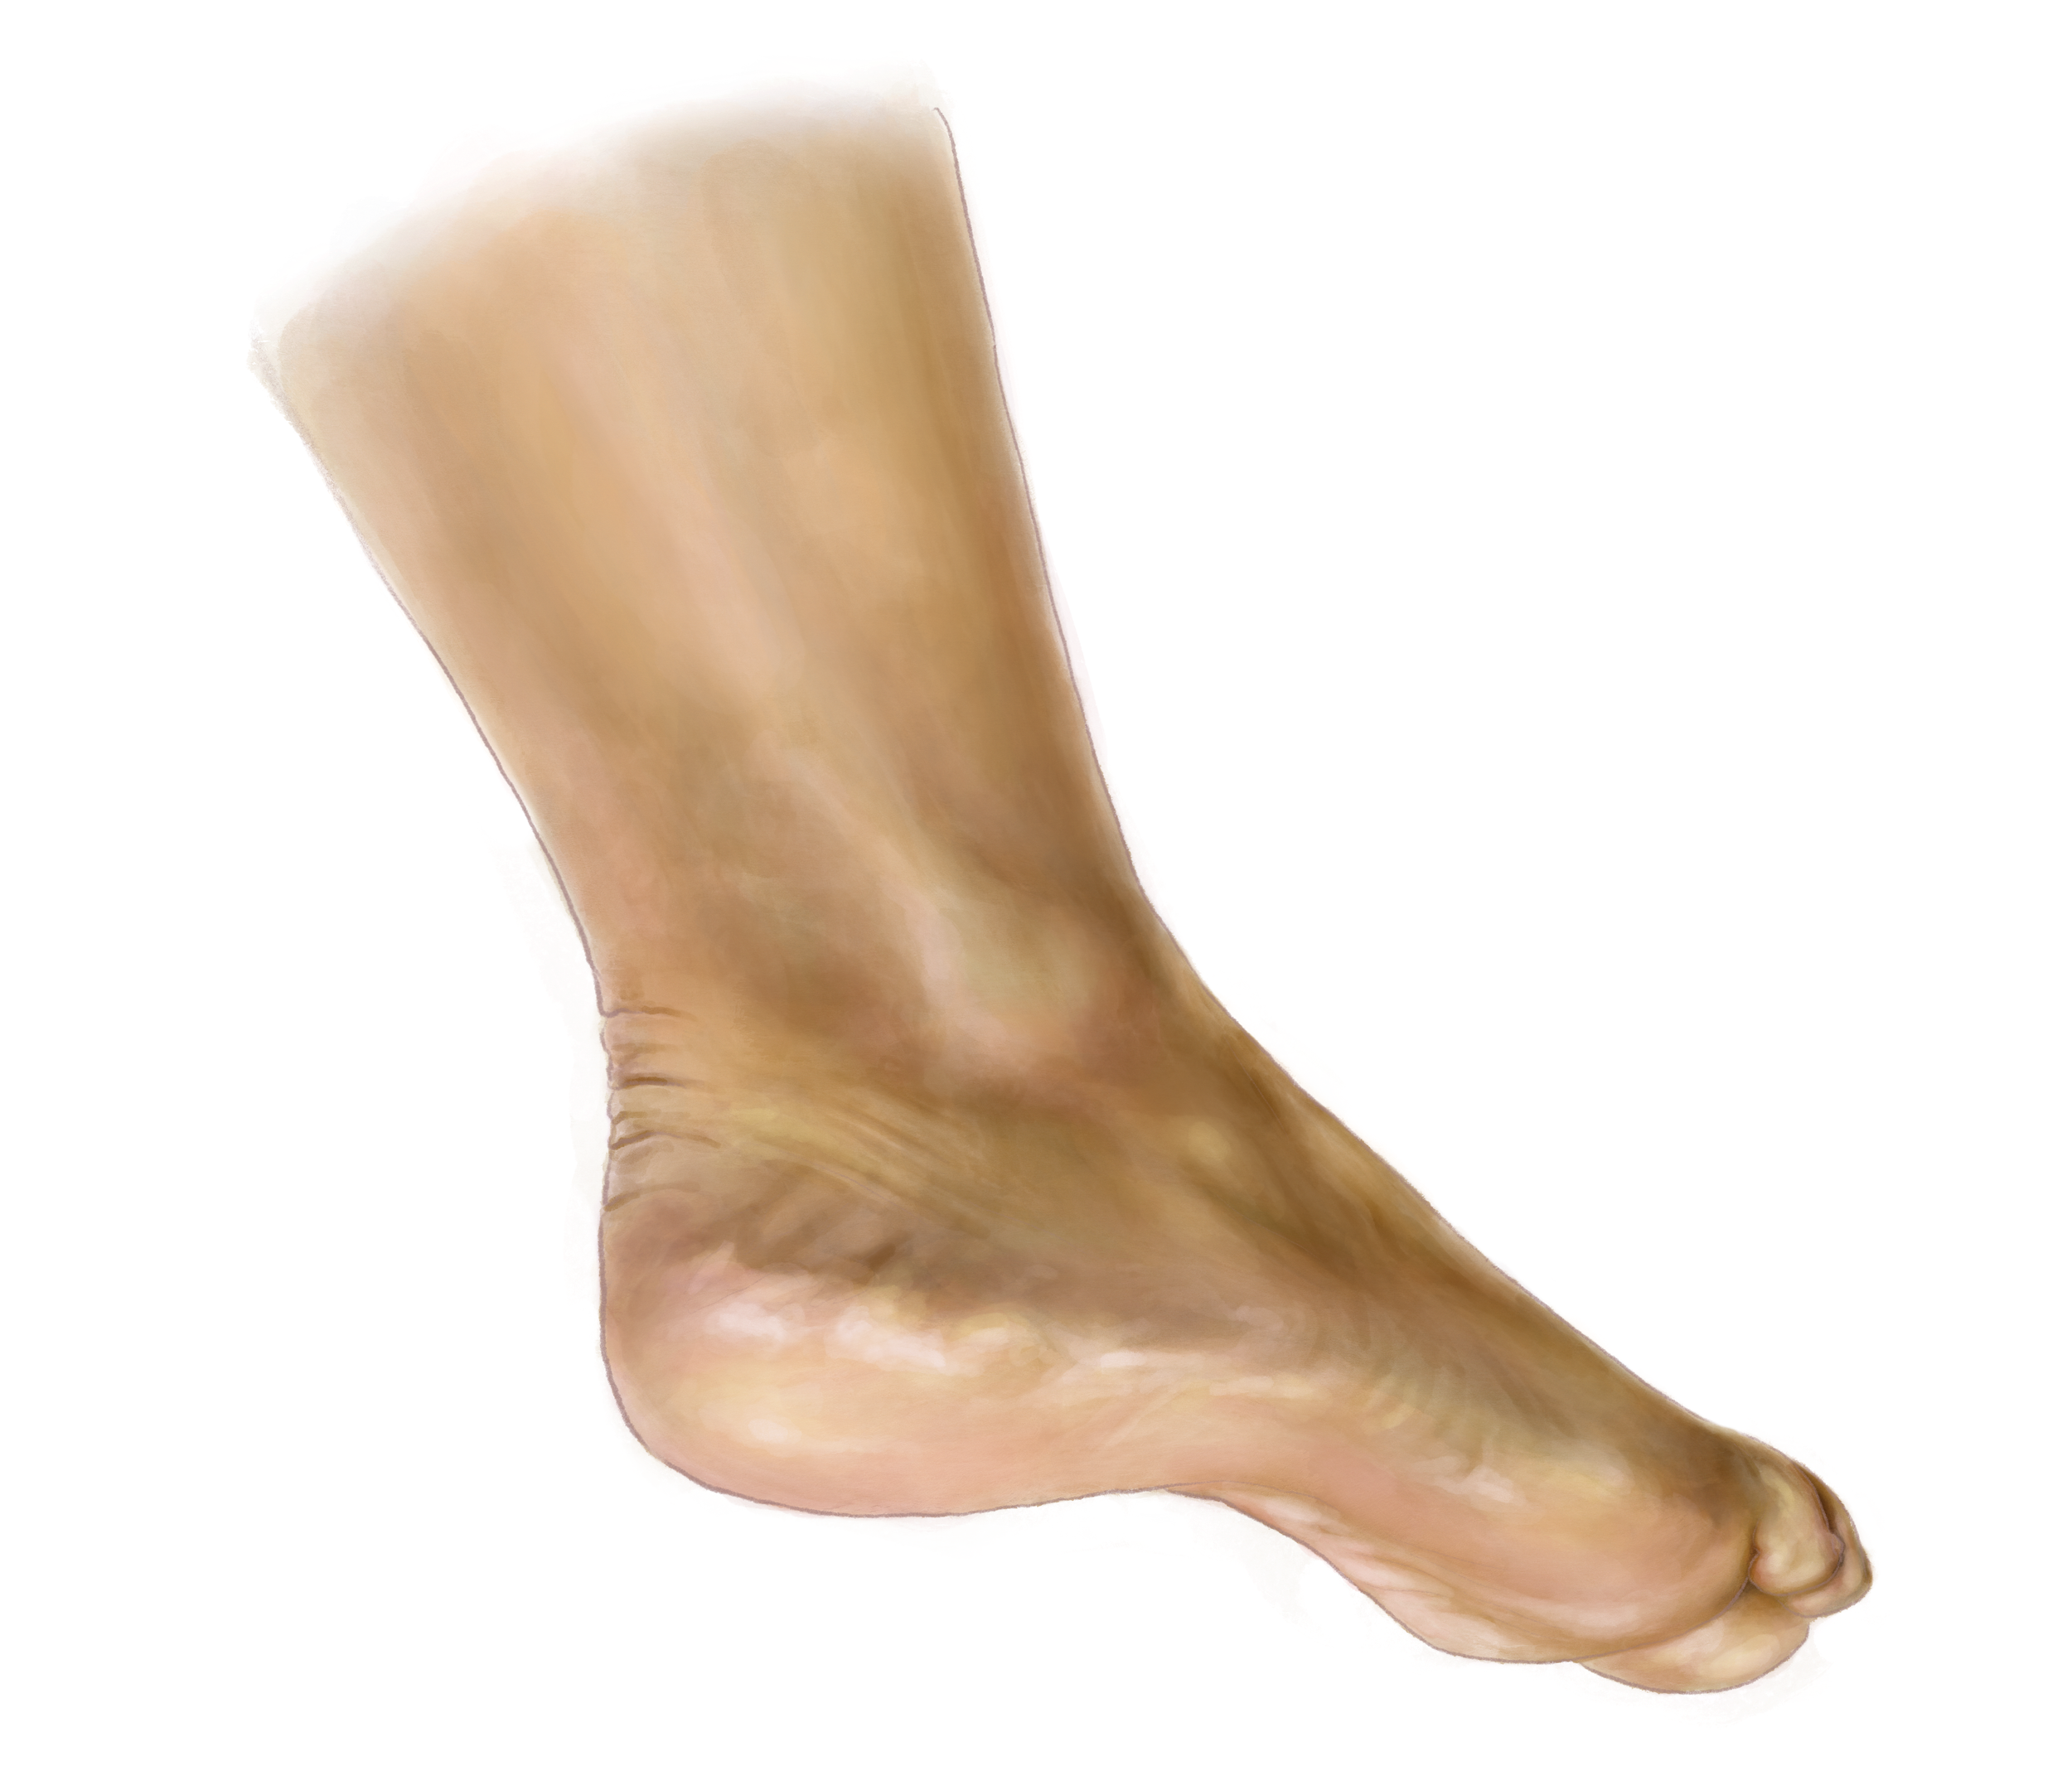

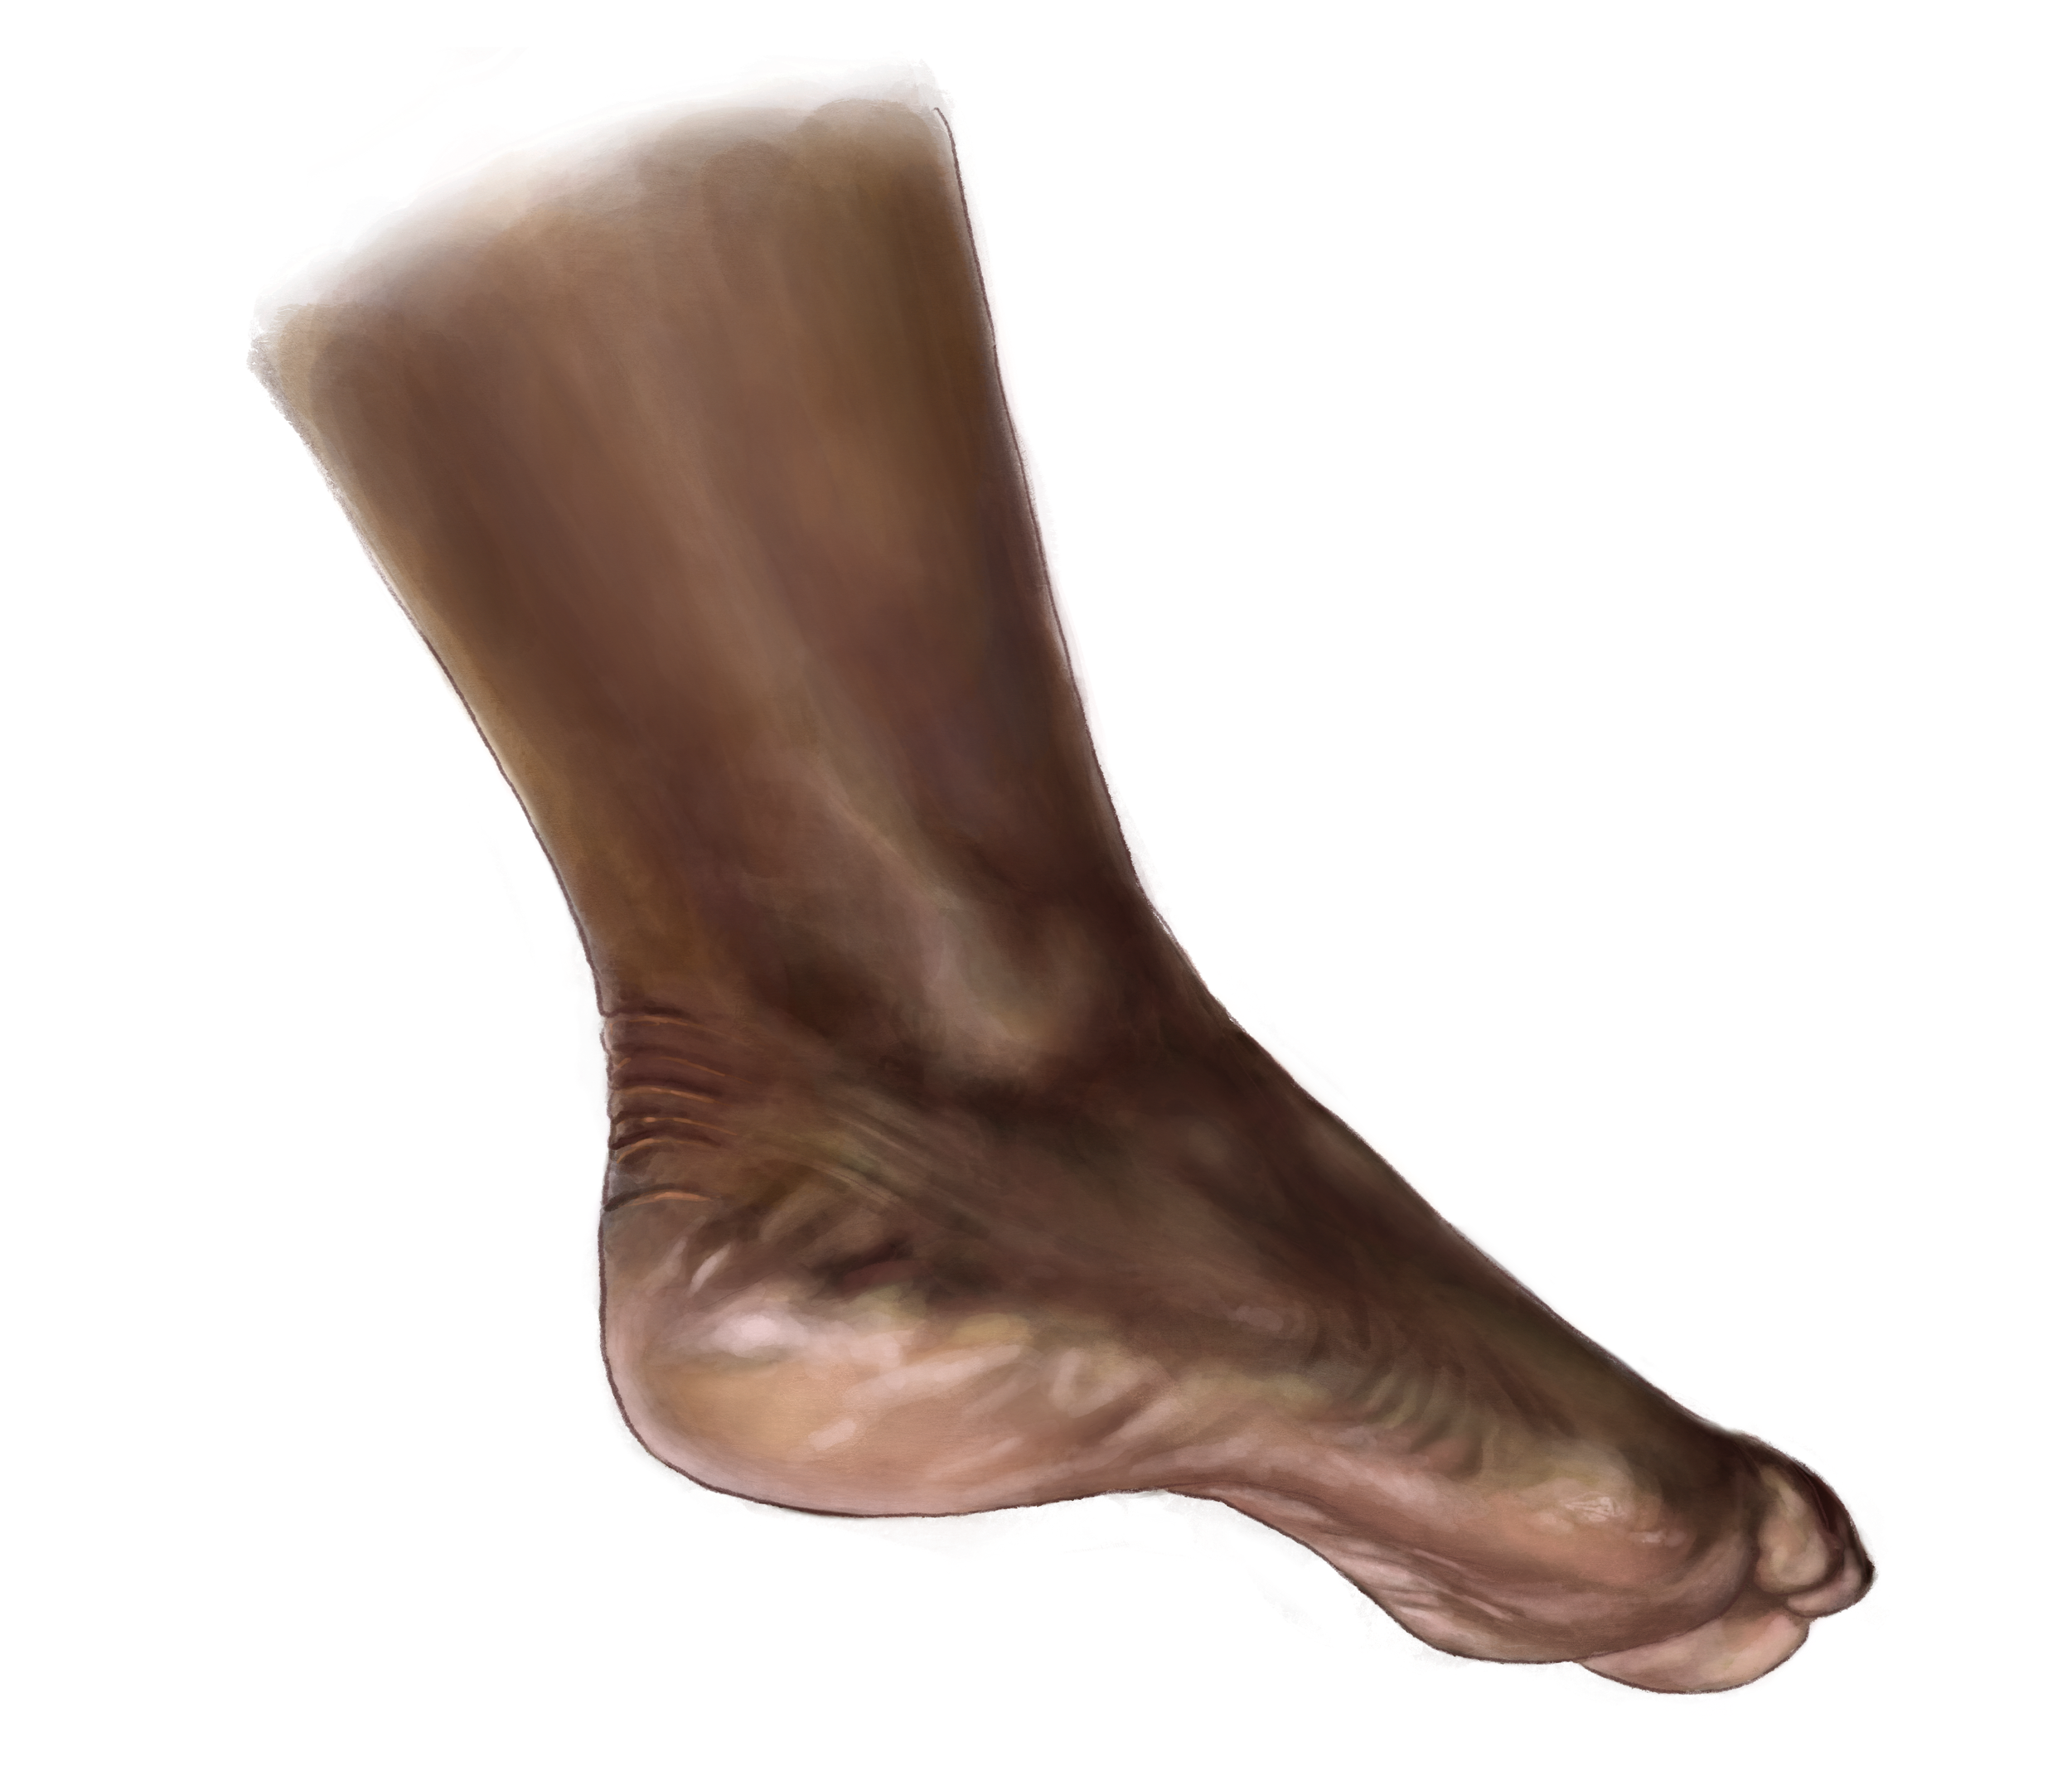
With these base illustrations established, I painted four skin tone variations for each body part, which served as foundations for illustrating the six different types of pressure injuries.
Foot skin tone variations (Backside not pictured.)


Each stage of the pressure injury was illustrated separately and used as a “sticker” that was overlaid on the base body part illustrations. Minor adjustments were made to align the skin tones with the skin tone variations.
Stage 4 pressure injury “sticker.”

Adobe Substance Painter Tests
Skin painting test using substance painter brushes.

Normal map panting brush test.
Wound Sculpt Test Using Zbrush and Adobe Substance Painter

Wound sculpt on sphere in Zbrush.

Painted and textured wound sculpt in Adobe Substance Painter.
3D Model Prep and Sculpting
I purchased two 3D Scan store models to speed up the 3D production process of my project. The initial step that I took in preparing the 3D models for my project was to remove the underwear from the body scan.
In Zbrush, I utilized the smooth tool on the scan’s lower subdivisions (1-4). This technique efficiently resolved the indentations and provided a seamless appearance to the hips while still preserving the high level details such as the pores and various textures of the skin.
For areas where the underwear texture had previously obscured the skin texture, I used the Xtractor tool with the Zadd channel enabled to capture the existing skin texture from the 3D scan and applied it to the smoothed out regions. With the underwear’s 3D properties addressed, the final step involved painting over the underwear to achieve a nude appearance.
Using the prepared dark skin nude model, I sculpted a stage 4 sacral pressure injury in Zbrush with the FormSoft, Inflat, and ClayTubes tools.


Adobe Substance Painter Tests Using 3D Scan Store Models


Painted Models Using Zbrush’s Polypaint
The original process, which involved transitioning from Zbrush to Substance Painter and back to Zbrush before finalizing the model in a 3D viewer, proved to be quite tedious and repetitive.
I believed that a more efficient workflow could be achieved. To streamline the process, I decided to eliminate the use of Substance Painter and instead performed all painting directly within Zbrush using polypaint.
This adjustment saved me time by reducing the need to switch between different 3D programs and resulted in higher-quality textures due to the consistent use of polypaint throughout the workflow.


WoundWatch Demo
Follow along the video to see a comprehensive view of WoundWatch’s pages and key features.
Link to final website: WoundWatch